
From an empty form to the first email
You need an HTML form and an email address. Everything else you set in the dashboard.
- Step 1
Key and ready code in the dashboard
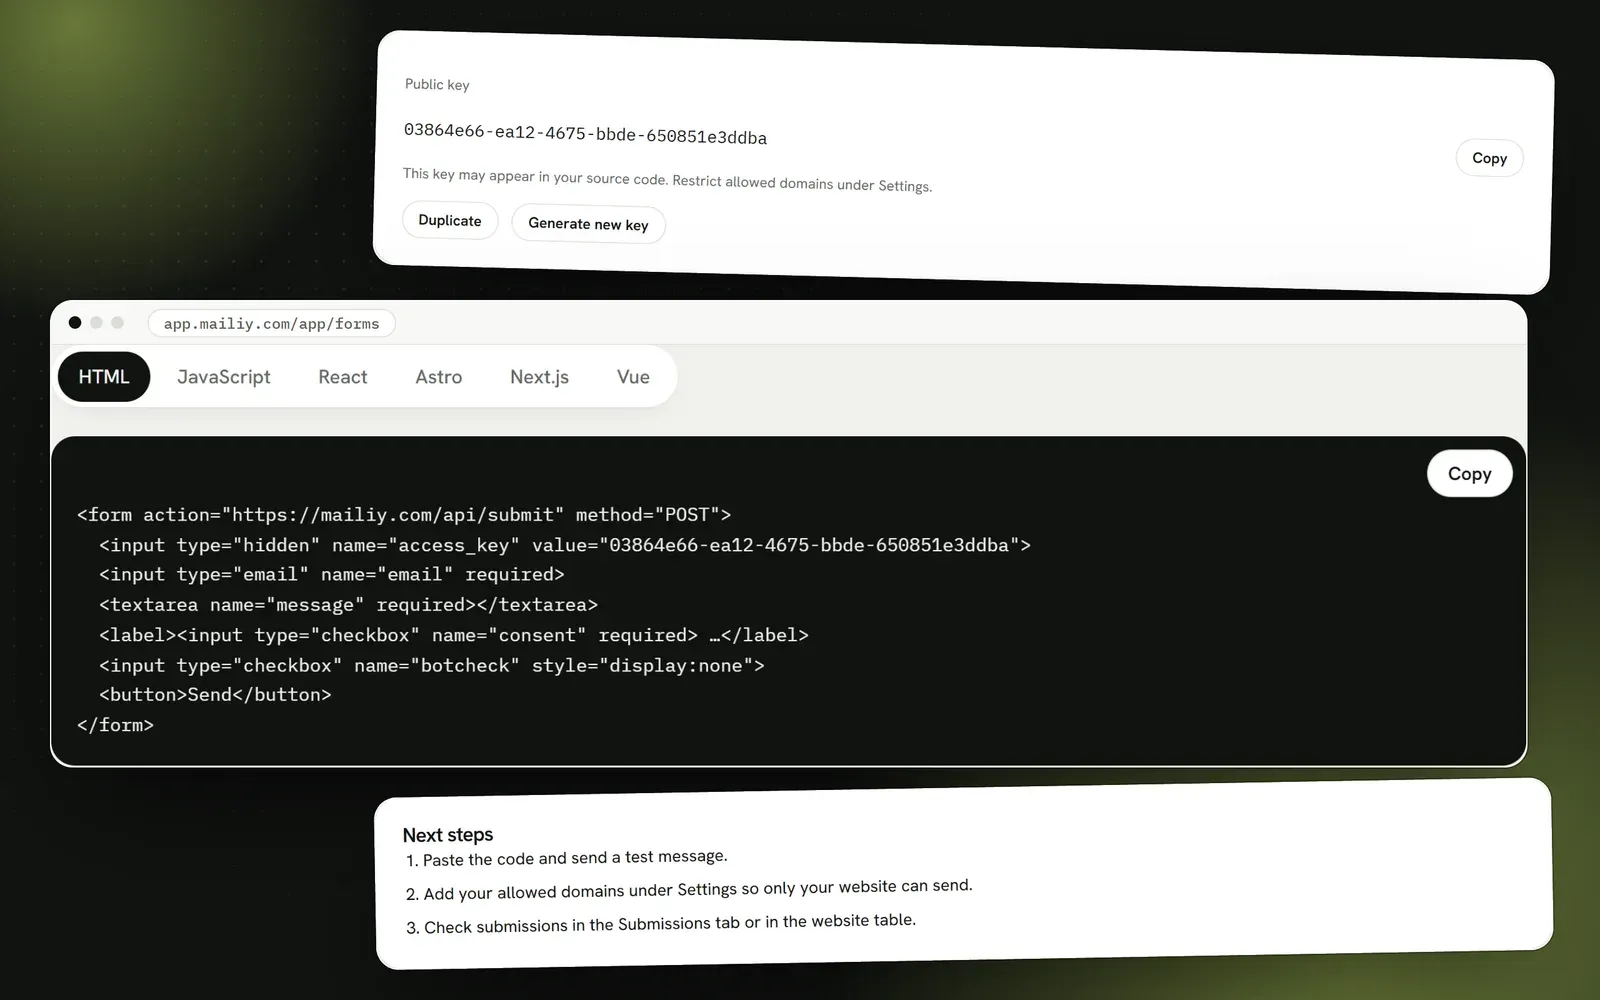
Every form has a setup tab with its access key and code for HTML and common frameworks. The steps next to it show what is left before the first submission.
<input type="hidden"
  name="access_key"
  value="YOUR-KEY">
- Step 2
Set it once per website
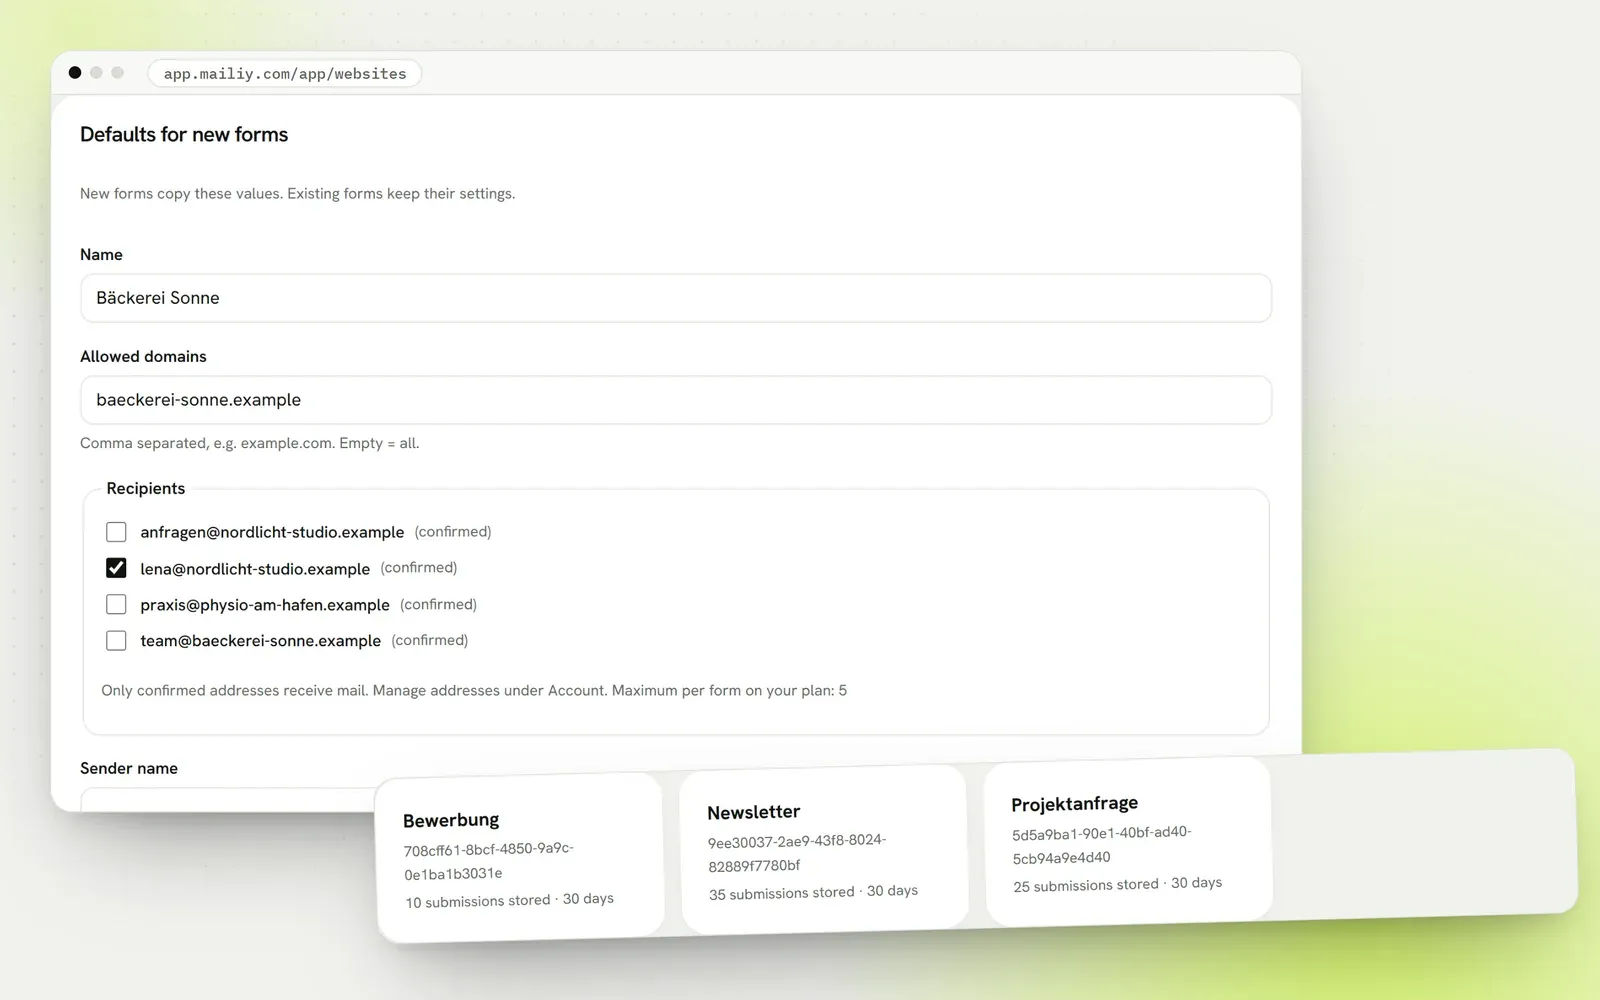
You set domains, recipients and sender name per website. Every new form takes them over, so nothing needs to be maintained twice.
- Step 3
The first submission arrives
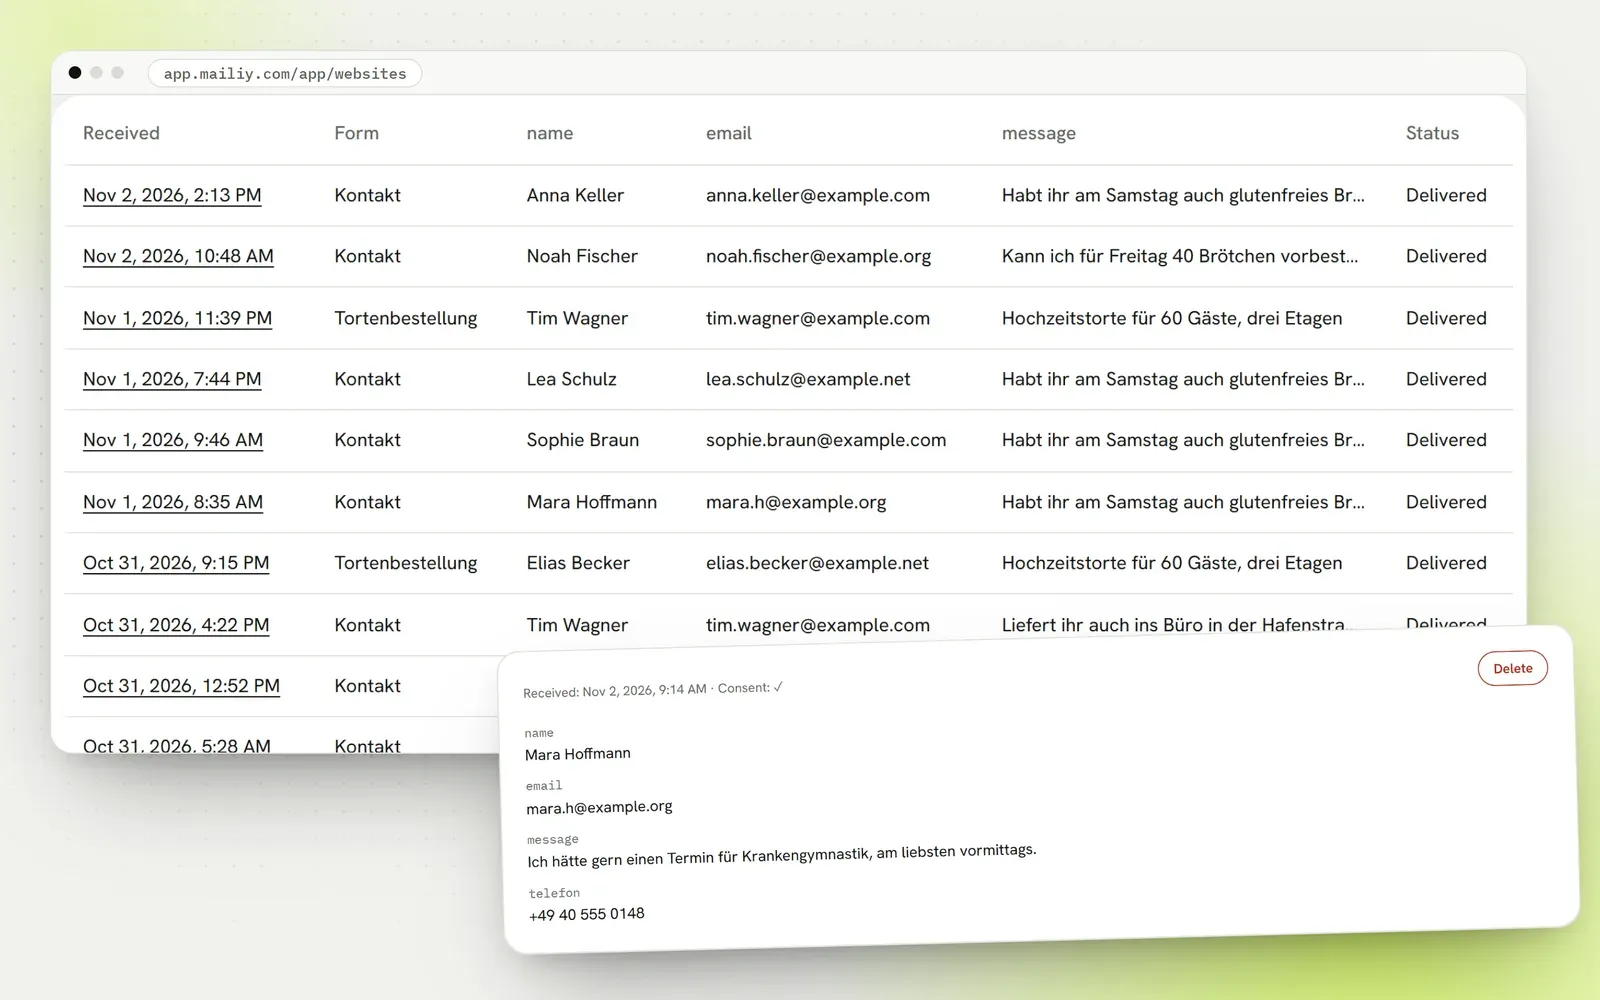
As soon as someone sends your form, the message is in your inbox and in the dashboard. Replies go straight to the sender.
- Step 4
Tighten spam protection
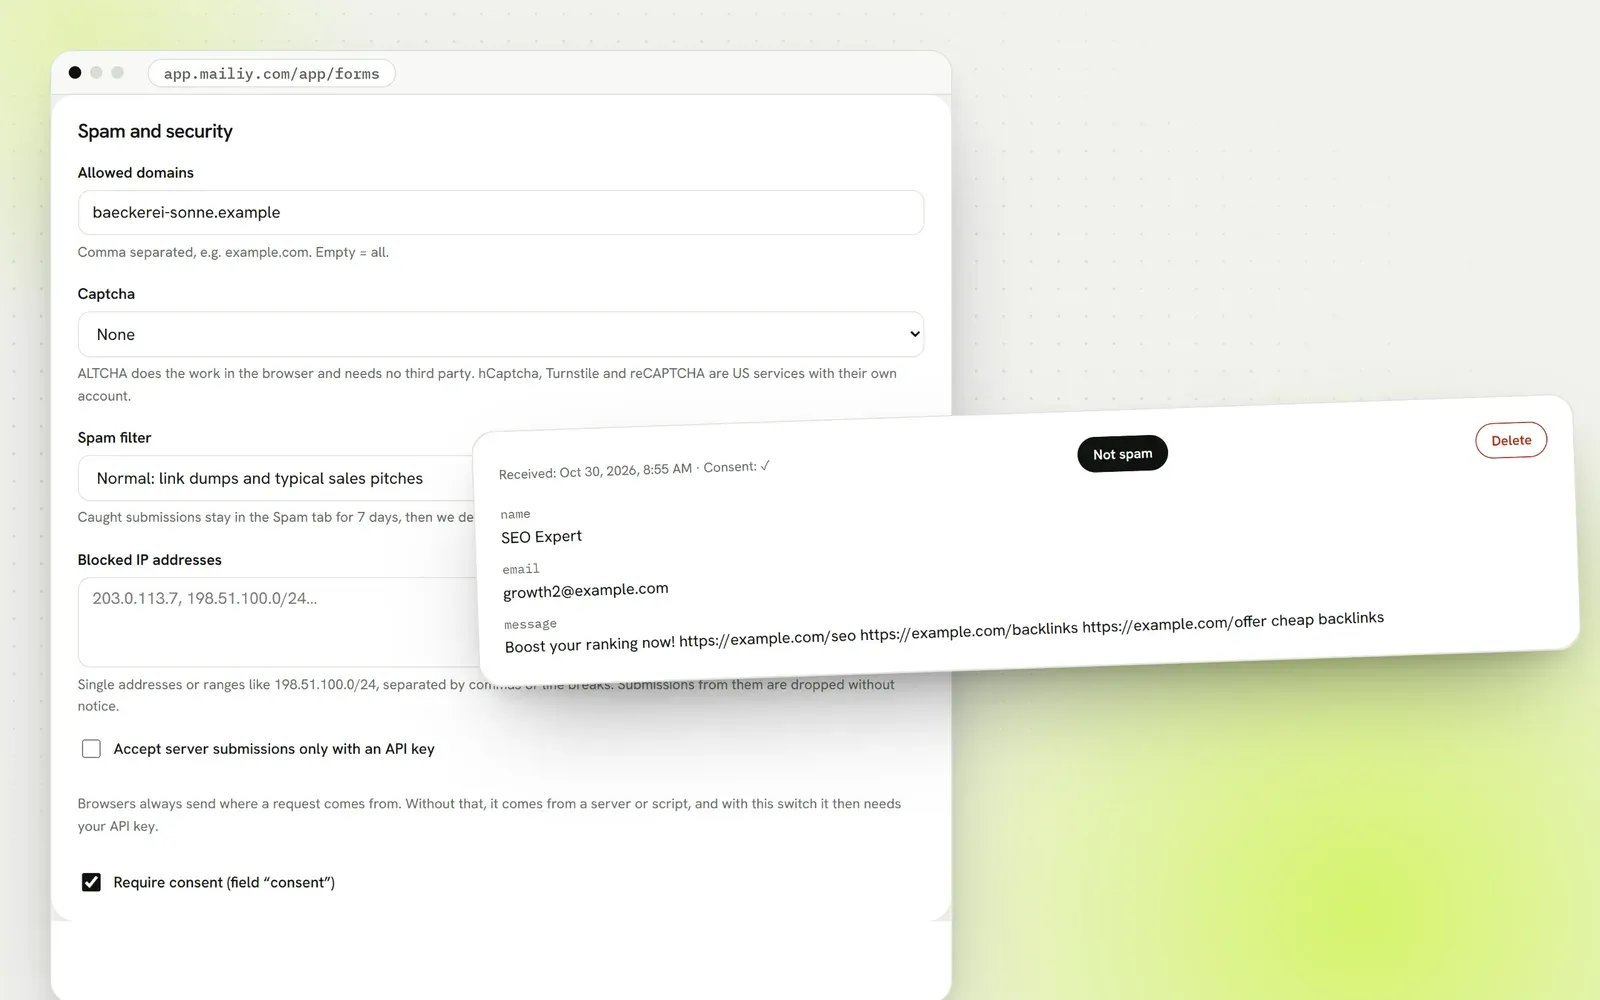
Honeypot, rate limit and content filter run from the first form on. The spam tab shows what was filtered out. If ads still get through, set the filter to strict, block single IP addresses or turn on a captcha.
- Step 5
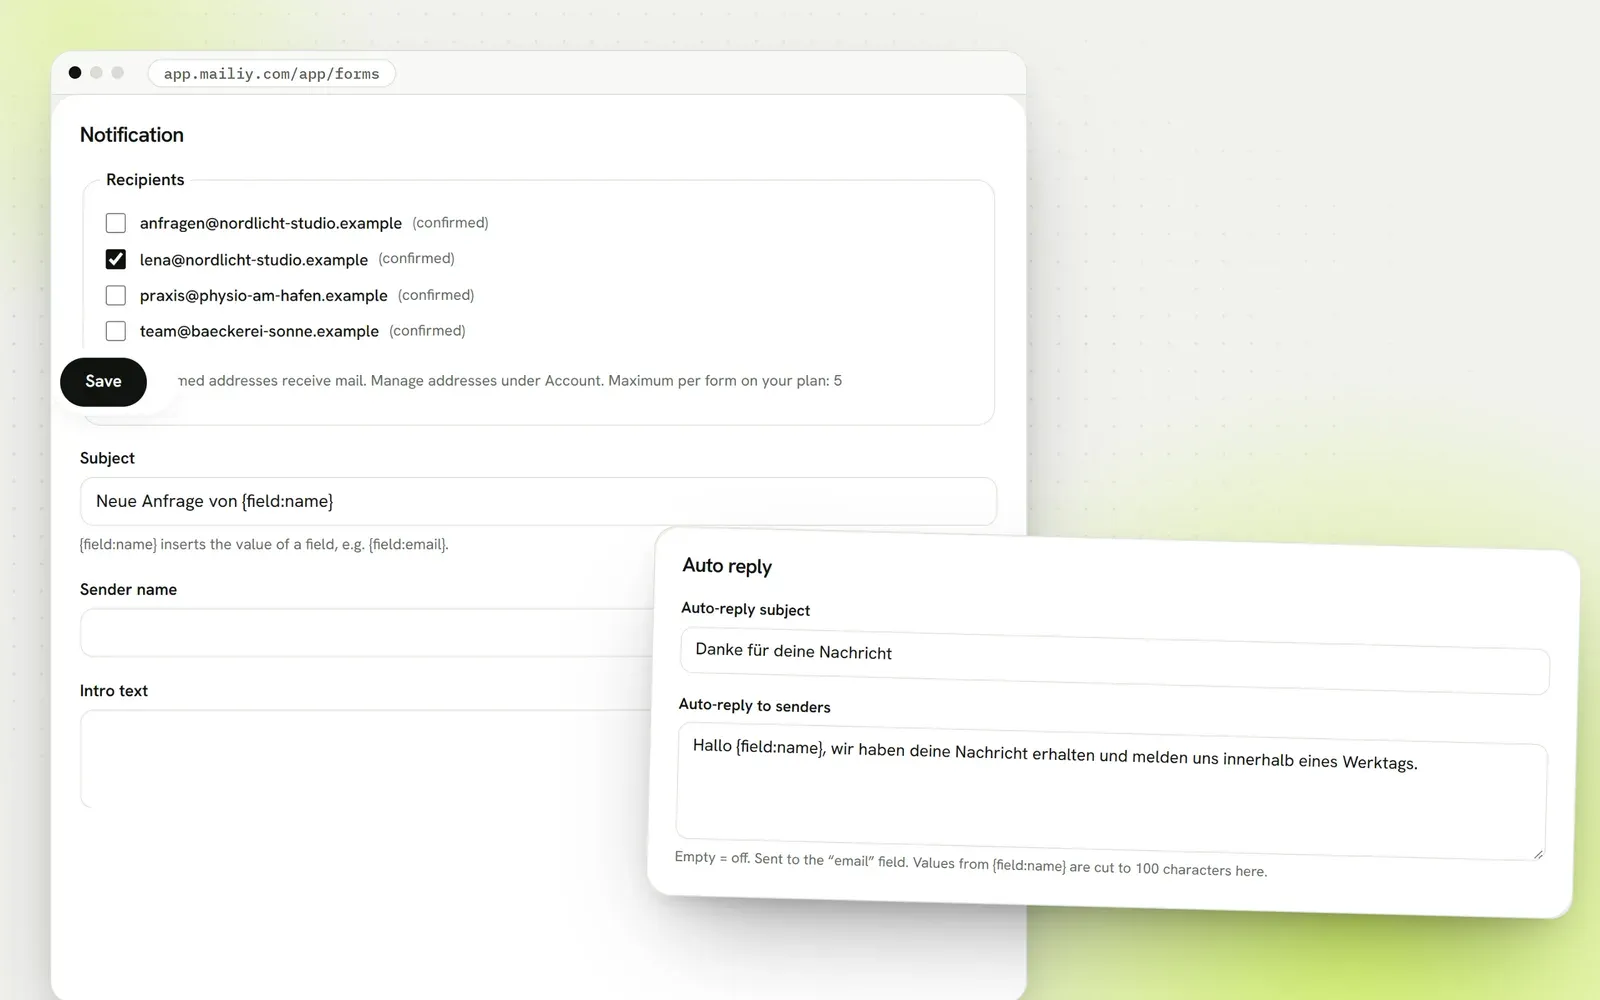
Adjust the email you receive
Pick one of seven templates and write a subject with placeholders like {field:name}, so you see in your inbox who wrote. If senders should get a confirmation, an autoresponder sends them your text.
- Step 6
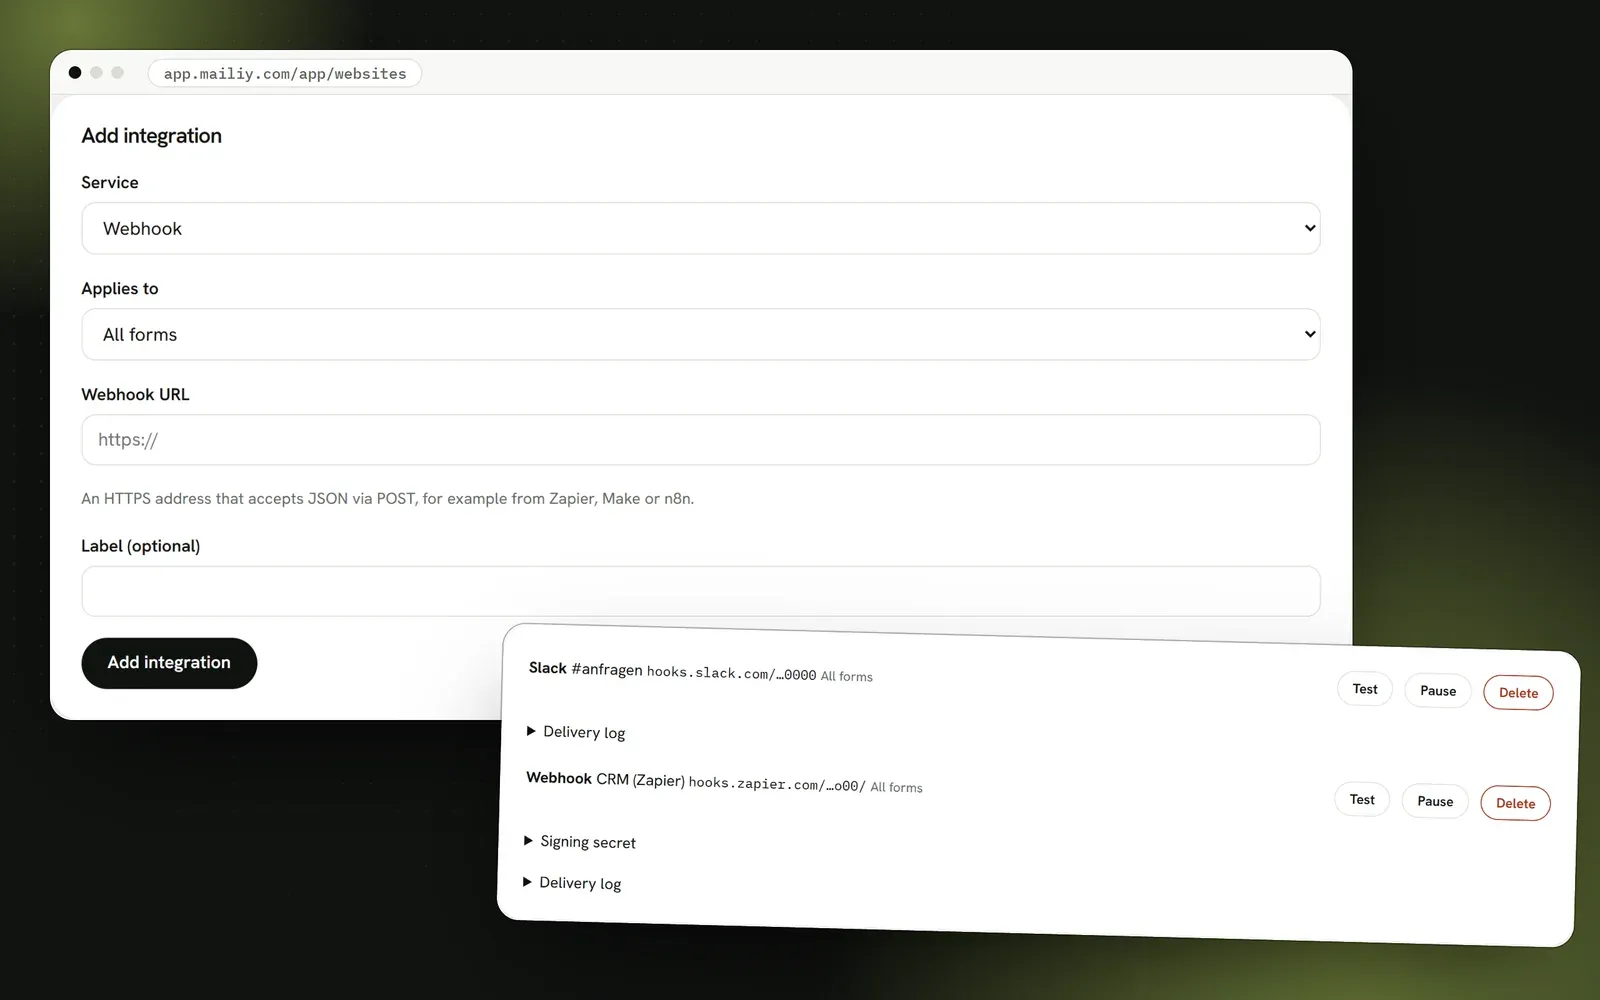
Pass submissions on
If your team works in Slack, Discord or Telegram, Mailiy also sends every submission there. For a CRM or an automation, add a webhook that receives the fields as JSON.
Need a custom solution?
Your own sender domain, self-hosting or high volumes: tell us what you need and we'll work out what's possible.